How to Upload Business Cards into Dynamics 365 for Sales
HOW TO UPLOAD BUSINESS CARDS INTO DYNAMICS 365 FOR SALES
The best thing about Dynamics 365 for Sales is how easy it is to add a lead into the system. Since the only required fields to add a lead are Topic and the Last name this makes it quicker to add a lead into the system. It’s also common for prospects to provide their business cards which can get lost or misplaced amongst other piles of paperwork. With the help of Dynamics 365 for Sales a Business Card can be added into the Dynamics 365 for Sales for safe keeping. Follow the steps below to add a business card into the profile or a new lead or a new contact.
1. Ensure that you’ve been assigned the Common Data Service User role.
2. Login to the Dynamics 365 for Sales environment.
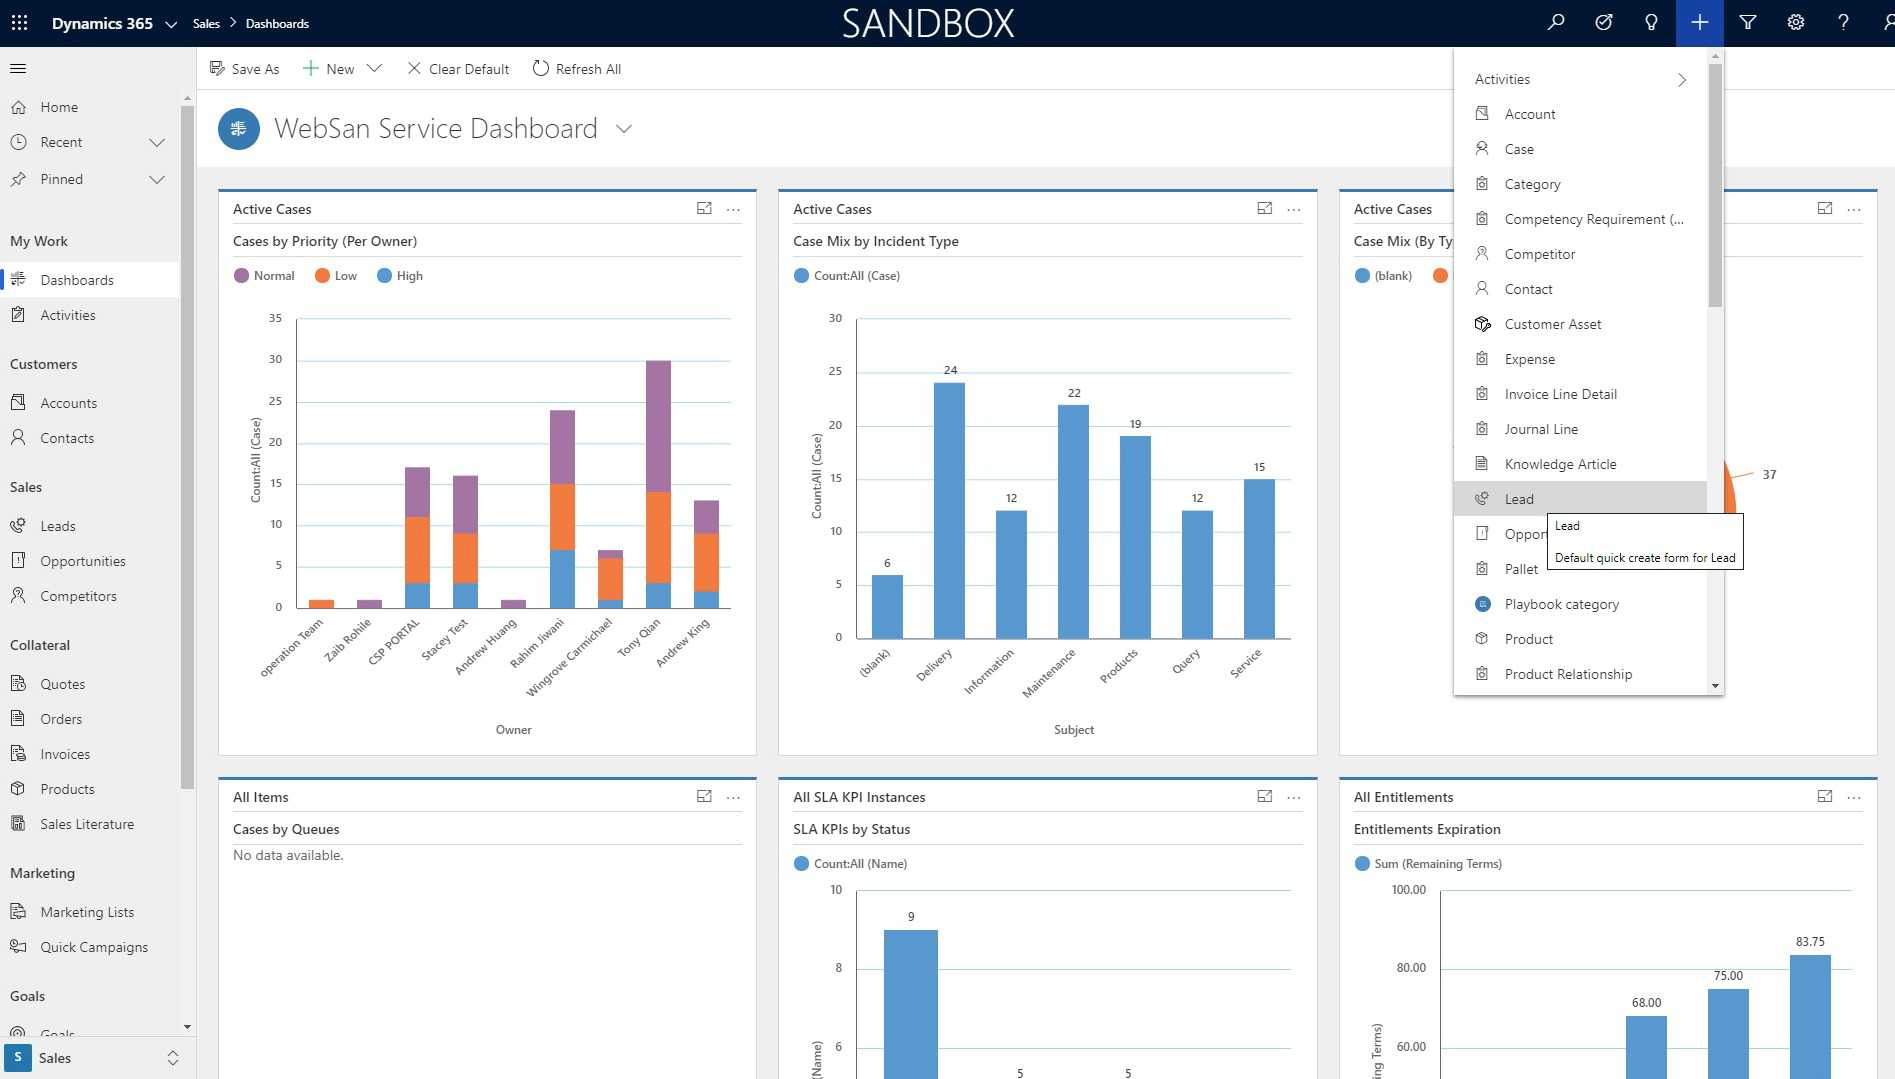
3. Click on the Quick Add Button on the top right navigation pane and click on Lead or Contact.

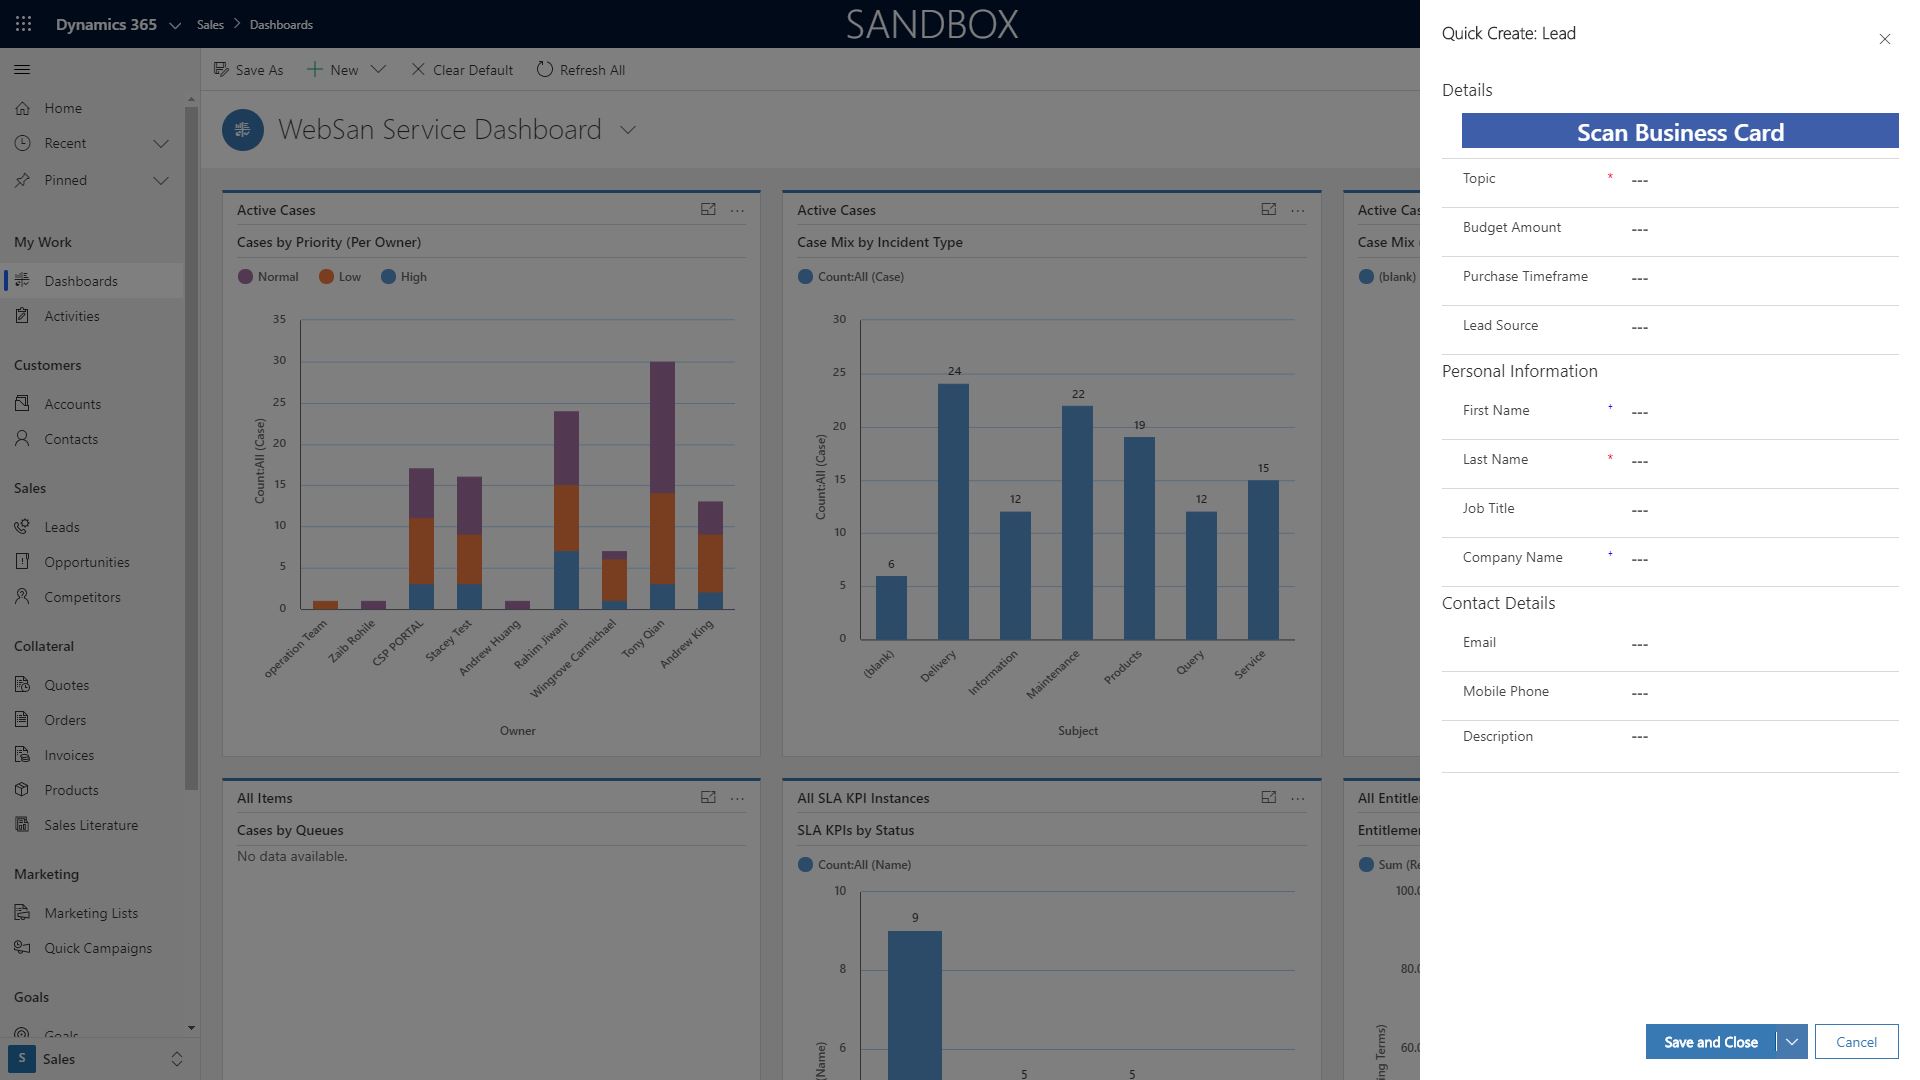
4. Once the Quick Create pop-up appears click on the Scan Business Card button.
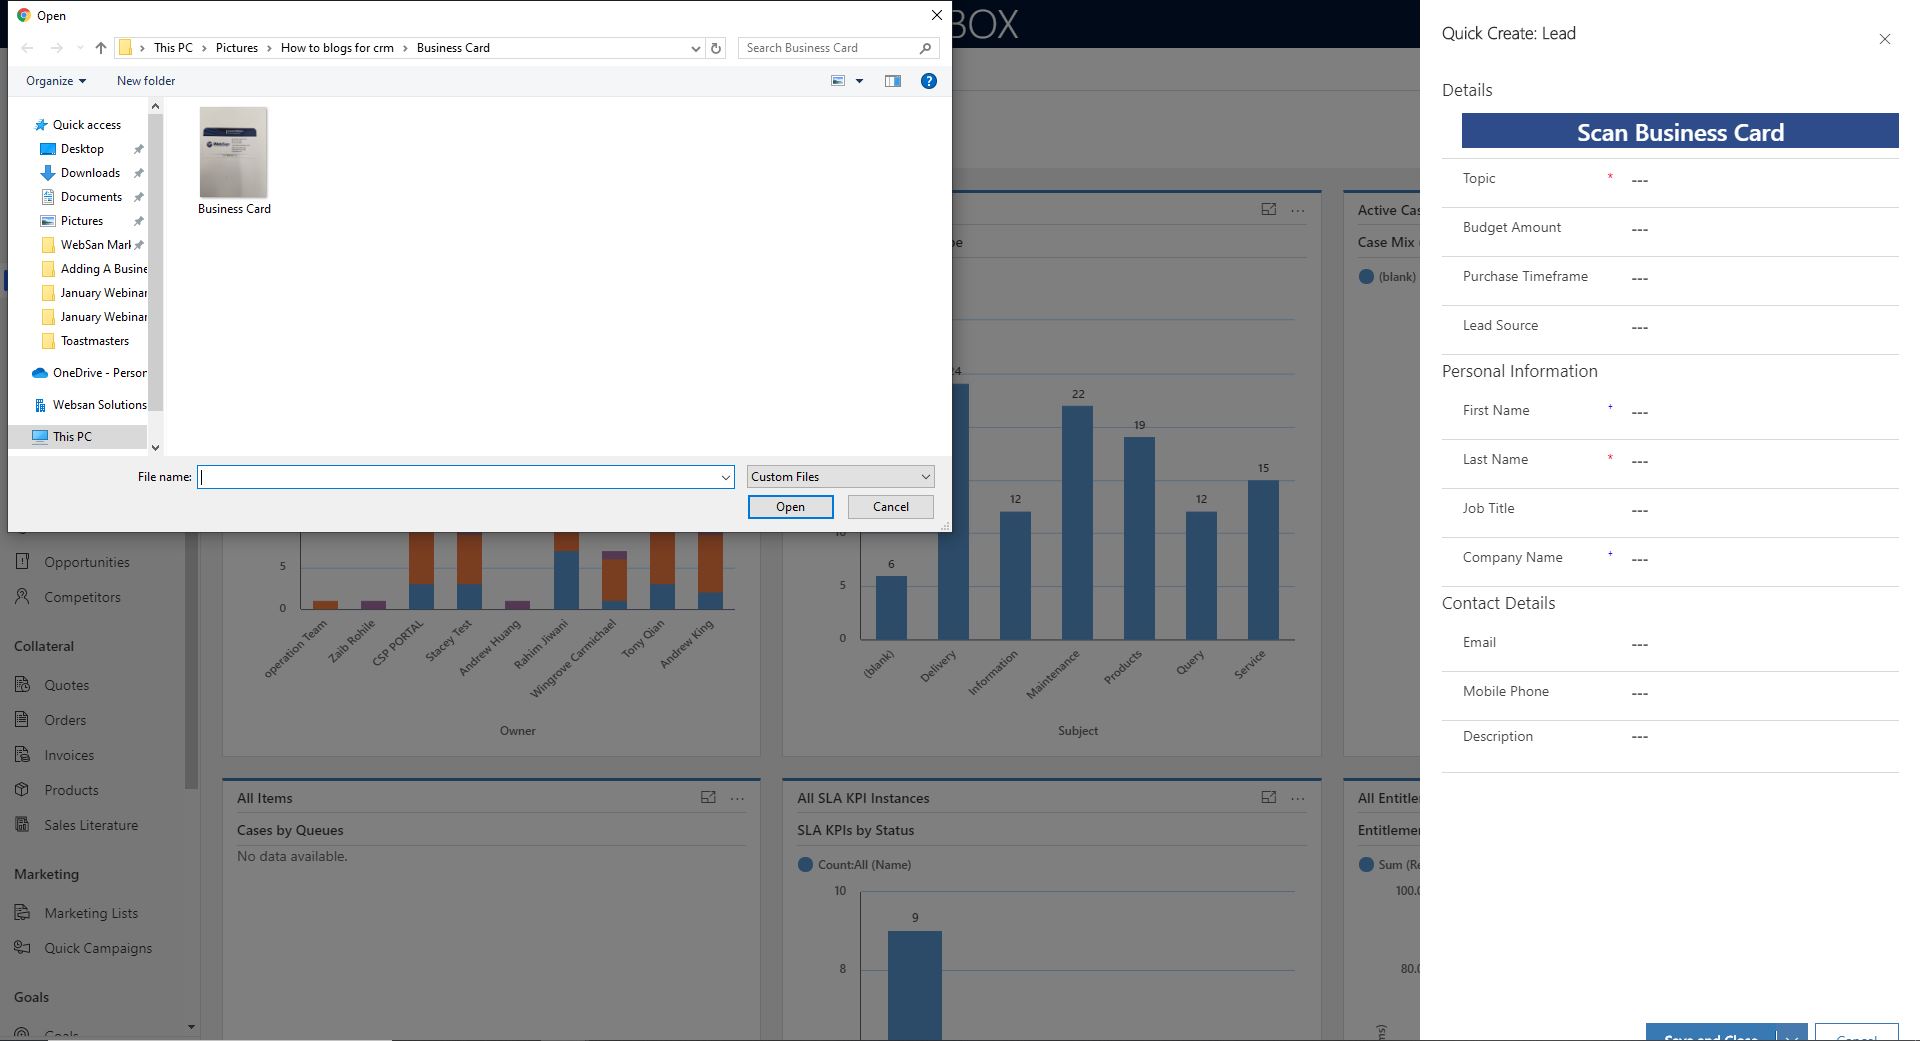
5. If you are accessing Dynamics 365 for Sales using the web browser it will ask you to upload an image of the business card.
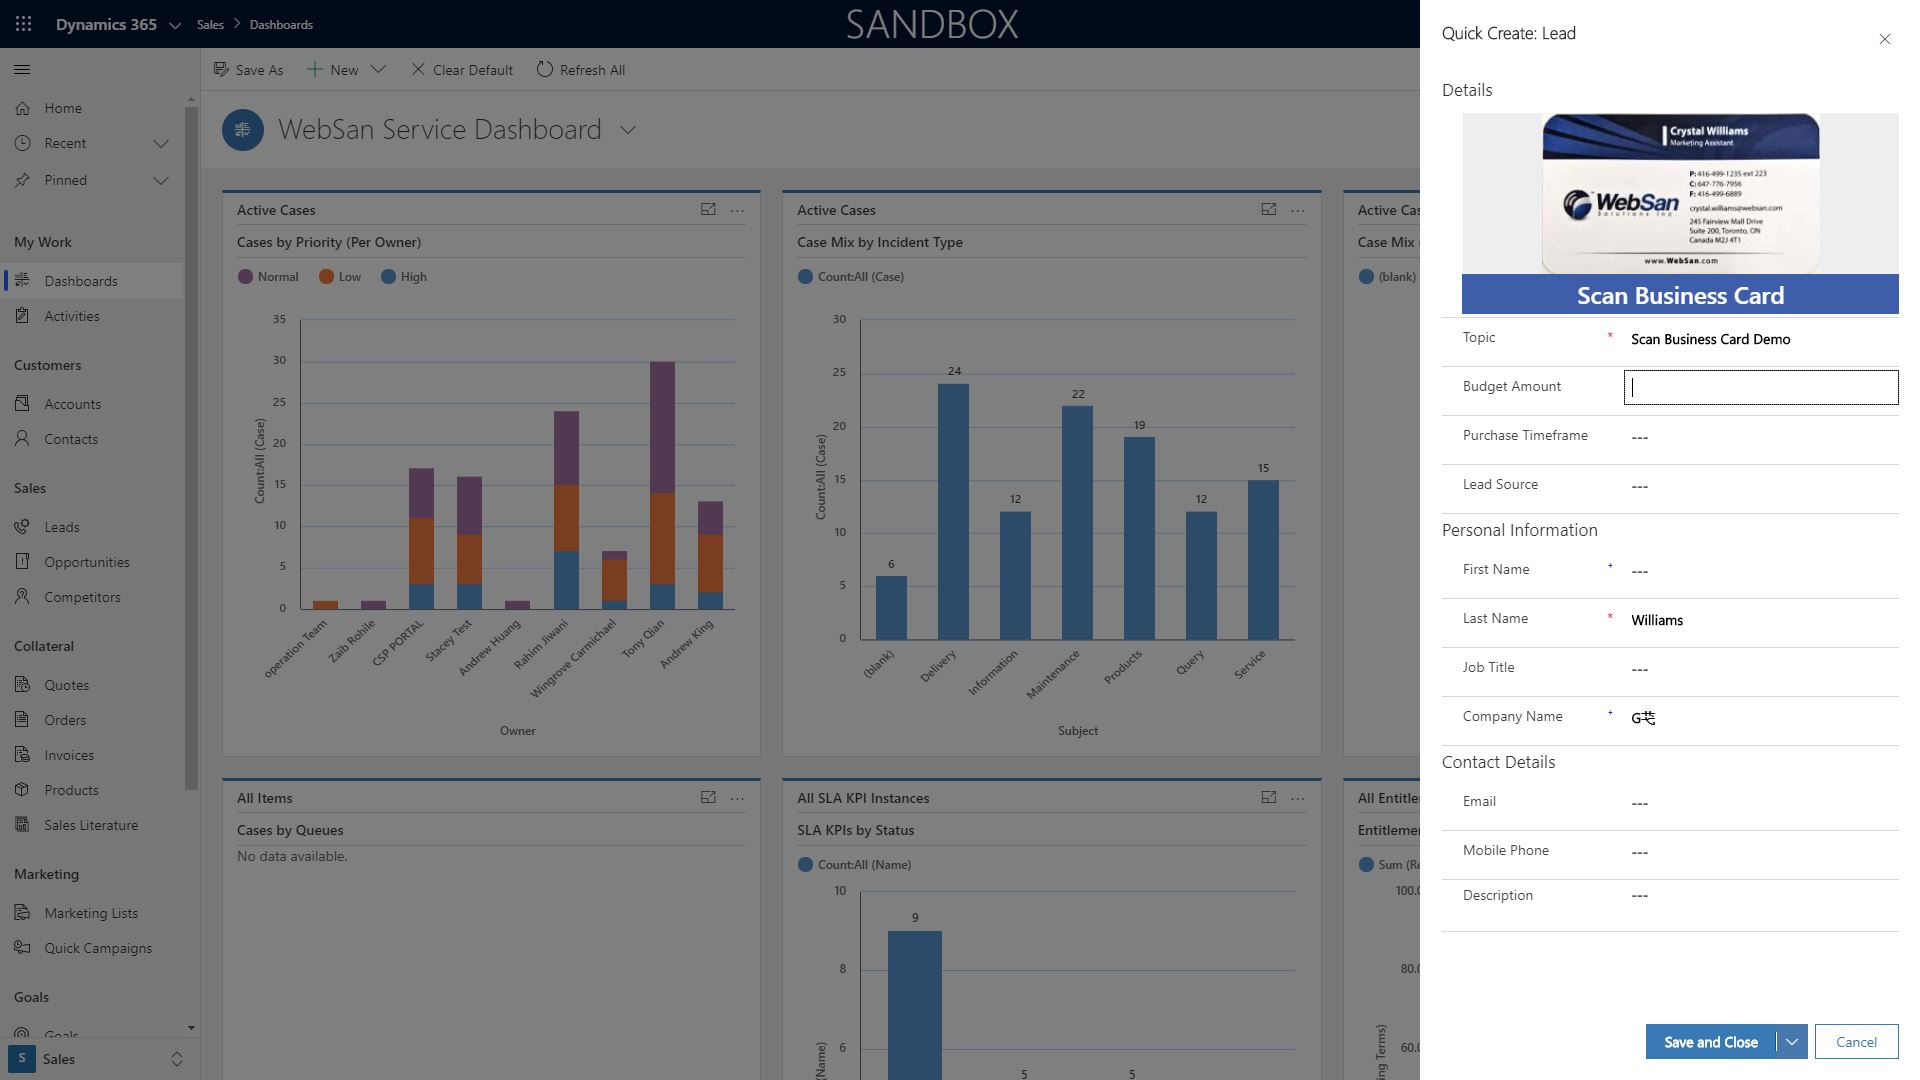
6. Select the business card you want to add into the system and then fill in all the missing information. Don’t forget that the only two *REQUIRED fields to create a lead are the Topic and Last Name in order to create a lead. All the other fields can be edited at a later date. Once you’ve filled in all the required information click on Save and Close.
7. So now if we go into our Leads on the right-hand side navigation pane, we can see that the lead has been added into Dynamics 365 for Sales.
8. If you open the newly added lead and scroll all the way down to the bottom of the profile that is where the Business Card is being stored.
Click Here to View all of the Dynamics 365 for Sales Courses!
images/UNIAD2.jpg


