Ease Navigation, Edit the Site Map in Dynamics 365
There is a standard site map for all Dynamics 365 instances, but chances are the default site map does not scream ease of navigation for your organization. It is important that Users can easily find the entities they need without hunting column by column, and more importantly they see what they need to see, and ONLY what they need to see.

Dynamics 365 provides the ability to modify the standard site map without coding, allowing everyday users to easily modify the layout, making it a better fit for your business. You will need either the System Administrator or System Customizer role to perform the following actions.
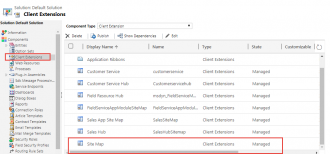
To customize the site map, simply go to Settings > Customizations > Customize the System.

You will find multiple site maps under Client Extensions, there is typically one which contains all apps, and then others which are each tied to a specific app.

In this case, we are using the default one which is labeled “Site Map”.

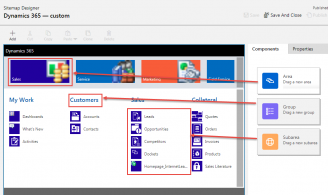
There are three components that you can easily drag and drop to create/modify your site map. Once you have each of the components added, you can click on each one and configure the properties for each component. And if necessary you can drag and drop the components around to change their order and/or the column they display in. You can also remove components which are not needed.
Tips:
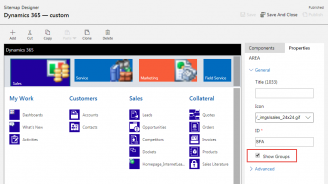
1. You will need to check the Show Groups checkbox to enable the Group before dragging the Group to your site map.

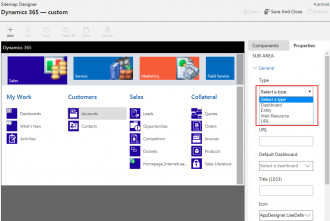
2. You can choose different Types of components for a subarea, and once you choose an option, irrelevant fields in the pane will be greyed out.

If you need assistance or have any questions when configuring your site map, please feel free to reach out to our support team at