Field Mapping - The Solution to Redundant Data Entry
Isn’t it maddening to fill out the same fields, with the same info, when creating a child record directly from its parent form? Well -- Stop Doing It! Let the system fill out those fields automatically for you, instead of eating up your own time on it!
One of the “quiet” features of Dynamics 365, that will significantly save you time and protect data integrity, is Field Mapping. The purpose of field mapping is to copy certain values (e.g. address fields) from a record to an associated record (e.g. a contact created from an account)
The following details how simple it is to create field mapping relationships.
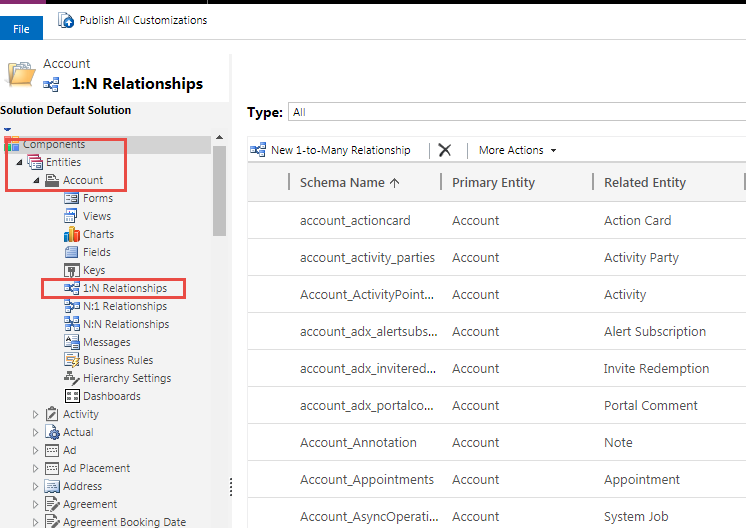
In Customizations, locate the Account Entity, and go to the “1:N Relationships” node.

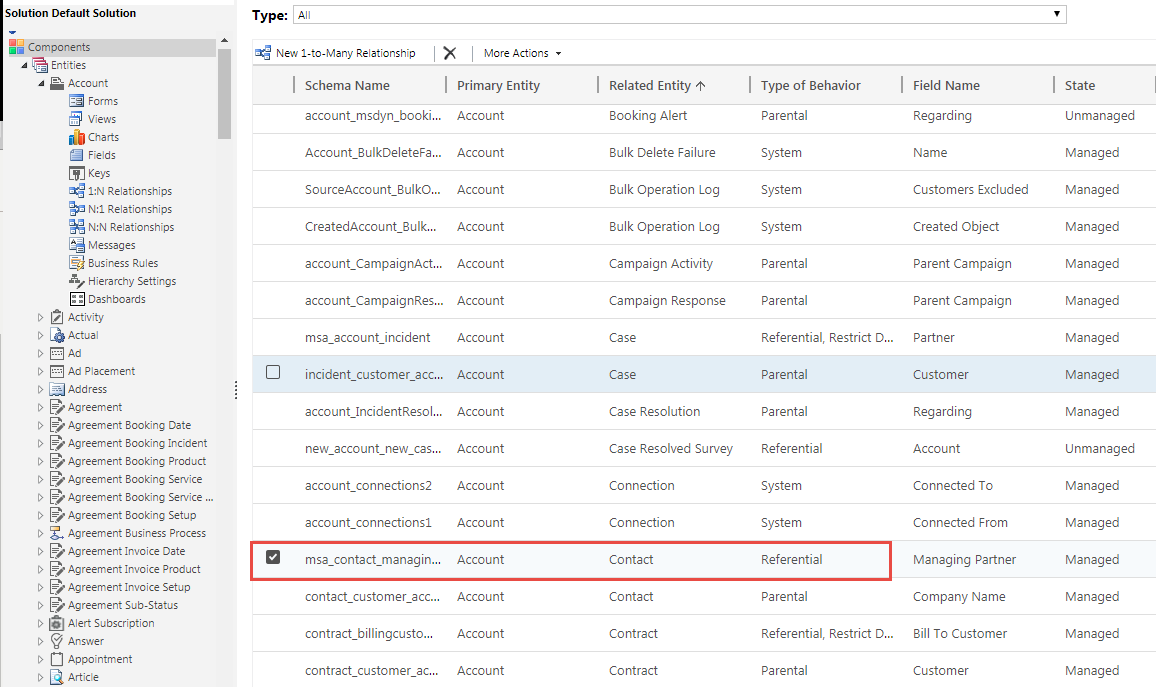
Locate the relationship which you want to carry values over (in this case, Account to Contact).

In the relationship editor window, click on Mappings.

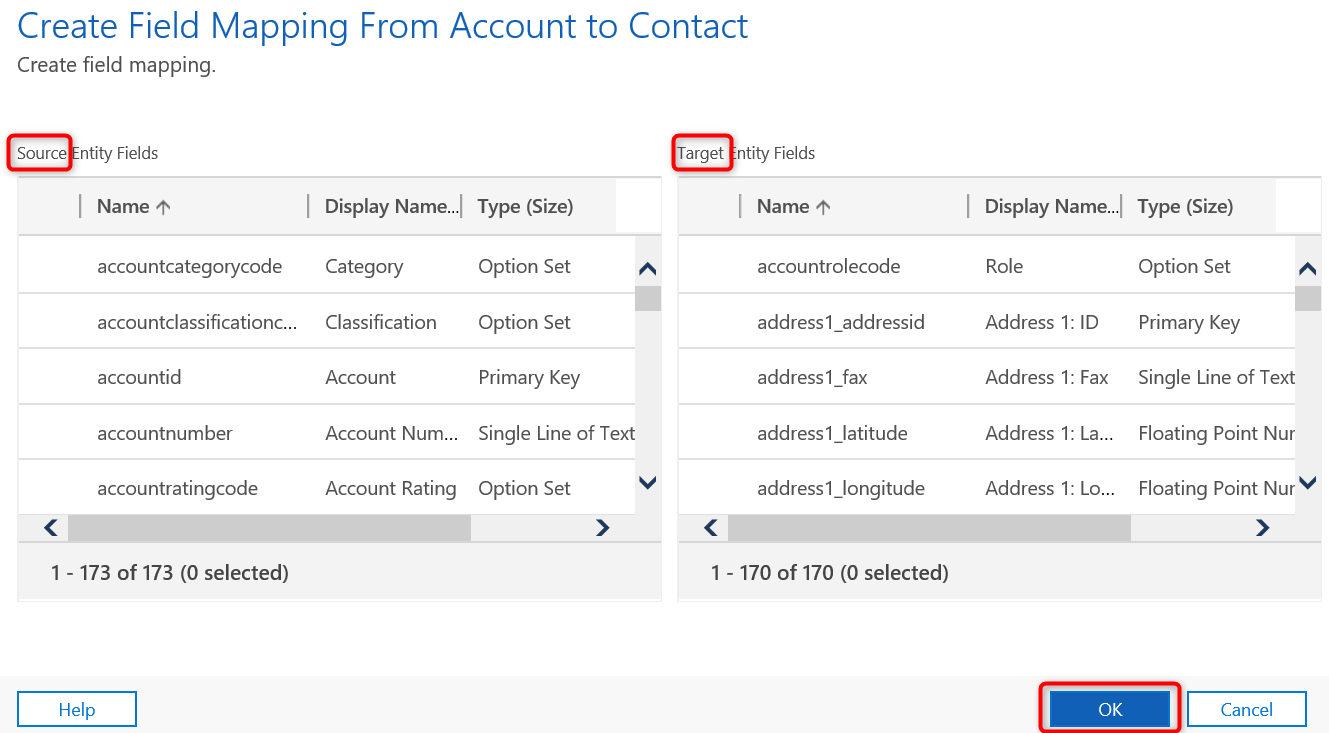
Select the field to be mapped from the SOURCE entity, which is the entity you are starting from (Account). Then select the field for your TARGET entity, which is the destination entity (Contact), that you want auto completed. Click OK once you are satisfied with your mapping. Repeat this step for each field you want to create a mapped relationship for.

There are a couple things to be mindful of with field mapping: The Data Type must be the same for both the Source and Target fields (e.g. Option Set to Option Set, Whole Number to Whole Number) and the destination field length should not exceed the source field length. Also be aware that this is a mapping upon record creation, updating values in the source record will not update the target record and updating values in the target record will not update the source record. For example, updating an address in accounts will not update the address in contacts. There are other ways to achieve those requirements, but we will save that for another blog.
If you need assistance or have any questions when configuring field mapping, please feel free to reach out to our support team at